
On This Page
Your Lifeline phone just broke. And now you’re stuck without your main way to stay connected? Don’t worry, you’re in the right place. A Lifeline phone broken can throw your entire day off, especially when help feels out of reach. But before you give up or rush to buy a new one, take a moment.
There are steps you can take that might turn things around faster than you think. What happens next could surprise you, so don’t scroll away just yet.
1. First Steps to Take When You Have a Lifeline Phone Broken
A Lifeline phone is a valuable benefit, especially for those who rely on it for essential daily communications. But when your phone breaks, it can disrupt your routine and cause unnecessary stress. These are the first steps you should take to handle the situation calmly and effectively.
Step 1: Check for Warranty Coverage
Most Lifeline phones come with a limited warranty. This may range from 15 to 30 days depending on your chosen Lifeline phone service provider.
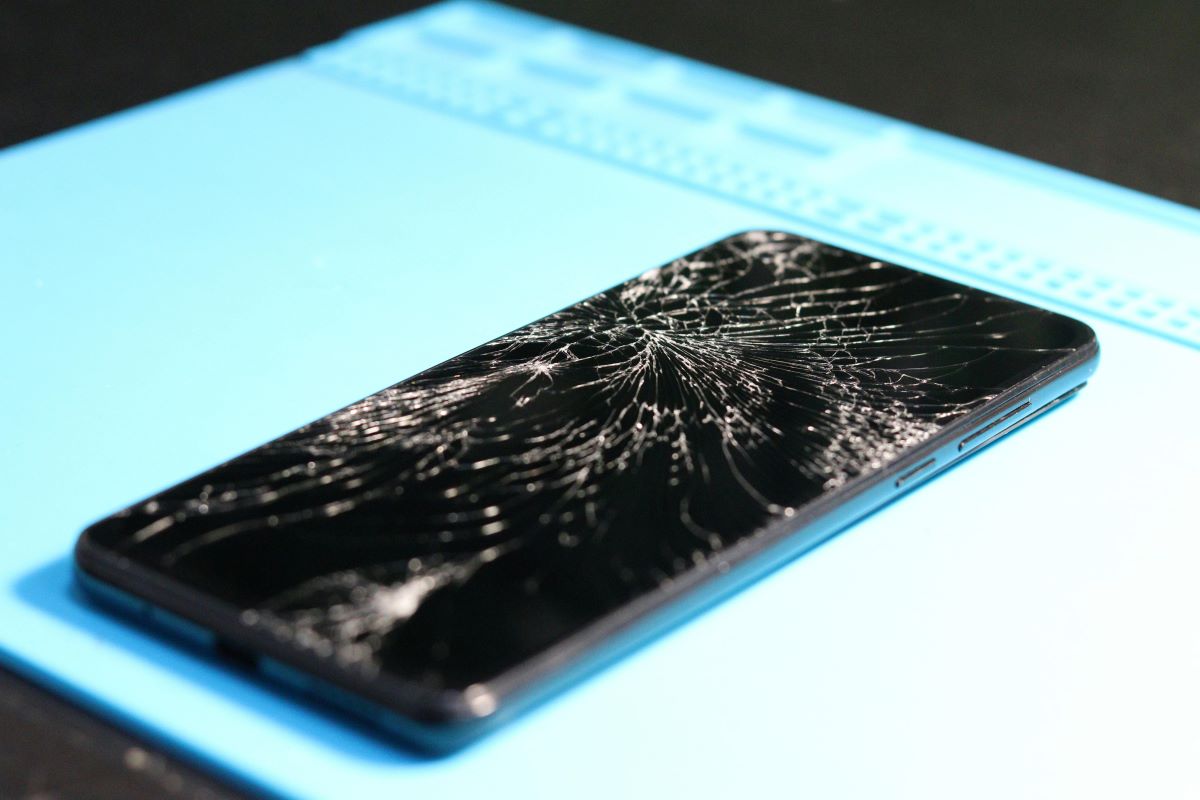
If your phone is defective or arrives damaged, you may be entitled to a free replacement. Check your provider’s warranty policy and the date you received your phone. For example, if your phone arrived with a cracked screen or won’t turn on at all, you might be covered, especially if you report the issue within the designated time frame.
Step 2: Contact Your Lifeline Provider
After reviewing the warranty, reach out to your Lifeline provider through their customer support number or online help center. While speaking with the customer support agent, clearly explain the issue and be prepared to follow any basic troubleshooting steps they suggest.
Some issues can be fixed remotely, while others may require further steps. Make sure to ask about any replacement policy they may offer.

Reach out to your Lifeline provider as soon as you can.
Step 3: Prepare Required Information
Having the right information ready can speed up the process. To help resolve your Lifeline phone broken issue, your provider may ask for the following:
- Your account or phone number
- Your full name and delivery address
- A detailed description of the issue
- Photographic evidence (for physical damage)
- Proof of delivery or purchase
The exact requirements can vary by provider, so check their website for any specific instructions or resolution guides before contacting them.
Step 4: Assess Whether You Qualify for a Free Replacement
After speaking with support, determine if you qualify for a free replacement phone. Generally, you may qualify if:
- The issue was caused by a manufacturer defect
- The damage occurred during shipping
However, if the damage was accidental or due to misuse, your provider may charge a fee or offer a replacement at a reduced cost.
Since replacement policies vary, make sure to ask detailed questions so you understand your options.
2. What If Your Lifeline Provider Doesn’t Help?
We’ve heard from many users that not all Lifeline providers are as supportive as they should be. Unfortunately, these are some of the most common issues people have shared:
- Long wait times just to hear back from customer service
- Unclear or confusing policies about replacements
- Outdated devices given as replacements
- Unexpected charges for support or device swaps
- Poor communication or no response at all when help is needed
If any of this sounds familiar, you’re not alone, and you don’t have to put up with it.
The good news is: you can switch providers. The Lifeline phone program allows you to choose a different provider if you’re not satisfied with the service you’re getting.

Not all Lifeline providers are as supportive as they should be.
Fair and Transparent Replacement Policy
If your free Lifeline phone arrives damaged or stops working soon after delivery, don’t worry – we’ve got your back:
- Report delivery-related damage within 48 hours, including:
- Cracked or shattered screen
- Phone won’t turn on (dead on arrival)
- Major hardware defects
- Any visible physical damage
- Not all problems show up right away—that’s why we also cover issues like audio problems, charging issues, or screen malfunctions under:
- 15-day warranty for free devices
- 30-day warranty for subsidized (low-cost) devices
If you experience any of these problems, be sure to contact our customer support right away. We’ll walk you through the steps and help determine if you qualify for a replacement.
Friendly and Reliable Customer Support
Our Lifeline free phone customer service team is here for you. Whether you contact us by phone or email, our agents are trained to handle Lifeline-related concerns. Many customers have shared how our support is quicker and more helpful than what they’ve experienced with other providers.
Fast Processing Time
We don’t like to keep you waiting. Once your replacement claim or application is approved, most users receive tracking info within a few business days, so you’re not without a phone for long.
Helpful Resources
We know how frustrating it can be when your Lifeline phone breaks, especially if you’re not tech-savvy. That’s why we’ve created simple, step-by-step guides to walk you through the process.
Here are some resources you might find useful:
- Troubleshooting Common Device Issues
- Quick Fixes for Common Issues
- How to Return or Exchange a Device
These guides are written in plain language and designed to be easy to follow. No tech background needed!
*Generous Lifeline Benefits *
Our goal isn’t just to replace your broken phone, we aim to reduce the chances of it breaking again by offering:
- High-quality, durable smartphones that last
- Unlimited talk, text, and data depending on your plan
- Free international calling to 200+ destinations
- Free access to 911 emergency calls
- Many more benefits!
Step 1: Check Eligibility
You may qualify for Lifeline benefits if your household income is at or below 135% of the federal poverty guidelines, or if you participate in government programs such as:
- Medicaid
- SNAP (Food Stamps)
- SSI
- Federal Public Housing Assistance
- Veterans Pension and Survivors Benefit
Step 3: Choose Your Lifeline Plan and Free Phone
We carry devices from top brands like Apple, Samsung, and more. Availability depends on your area and stock.
Choose your plan and preferred device!
Step 4: Upload Documents (If Required)
You may need to provide proof of identity and eligibility. This may include:
- A valid photo ID
- Program participation documents (such as a SNAP approval letter) or proof of income
- Proof of address
Make sure your documents are clear and legible to avoid delays.